Something that is often overlooked but is one of the most important tools for nail professionals, is the nail file. Nail files seem as simple tools, and many incorrectly believe that any nail file will do the job. But when working with nail files, there are some different points you must know and consider, both for filing natural nails, overlays and about the file itself. This guide will not only explain the technical details, but at the end also recommend you which file to choose for each task.
Download your guide to nail files here!
Click on the topic you want to read...
...or keep scrolling to read the whole blog.
- What is grit, and what does it mean?
- What is the difference between files and buffers?
- What significance does the shape of the file have?
- Which type and grit to choose?
- Does the quality of the file matter?
- How to clean and sanitize your nail files
- Do nail files need replacing?
- Nail Diva™, the best combination of the highest quality levels in one file
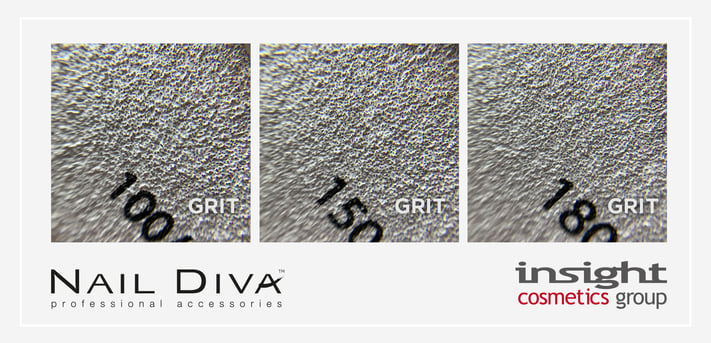
What is grit, and what does it mean?
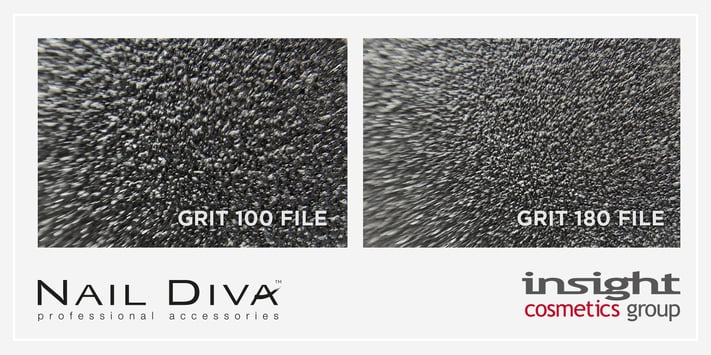
I am sure you have seen numbers on pretty much every file on the market. But what do they mean? The numbers refer to how course the grit is on the nail file surface, or more correct the size of each grain, as the number tells how many grains of sand fits in to one square inch. The smaller grains of sand, the more fit in to a square inch and the higher grit or smoothness. If both numbers are the same, then both sides have the same grit- if the two numbers are different, then the two sides have different grit. For example, a 100/100 grit file means both sides are the same. A 100/180 grit file on the other hand, will have one side with a softer grit than the other. Knowing that, we can now clearly understand which file is coarser and which one softer:
The higher the number, the smoother the file grit.
The lower the number, the coarser the file grit.
Envision a 1-inch square filled with 100 grains of sand; it will be very rough. If you take a 1-inch square and fill it with 240 grains of sand, it will be much smoother, so the higher grit the less impact to the nail surface, the less material is removed when filing and the more smooth the nail surface is left back after filing.
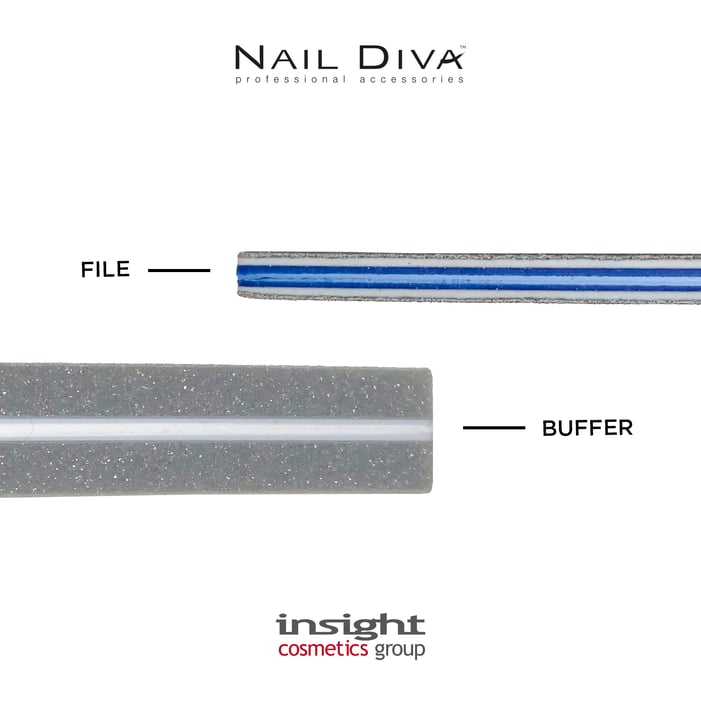
What is the difference between files and buffers?
The material between the two sides of the file, also called the board or the core, are also of great important to the result. The harder and less flexible, the more of the energy you transfer from your hand will also be transferred directly to the area between the file and the nail plate, and thus resulting in more powerful effect. Therefor it makes sense to combine a hard core with low grits, as you want to remove more material and work efficiently without having to push too hard, harming your hand, arm or shoulder when working many hours per day. If you on the other hand want to give the nail plate a high shine, and therefor work with high grit, it is better to work with a soft core, that absorbs and evens out the level of energy you transfer to the file. We call this buffing the nail, and therefore we also call the very thick, soft, and spongy files for buffers. Buffers are more flexible and more gentle, ideal for polishing product or the natural nail depending on the grit. So, e.g. a 180-grit file is working different on the nail plate, depending on if it is a file or a buffer, as the amount of energy transferred from your work is different.
What significance does the shape of the file have?
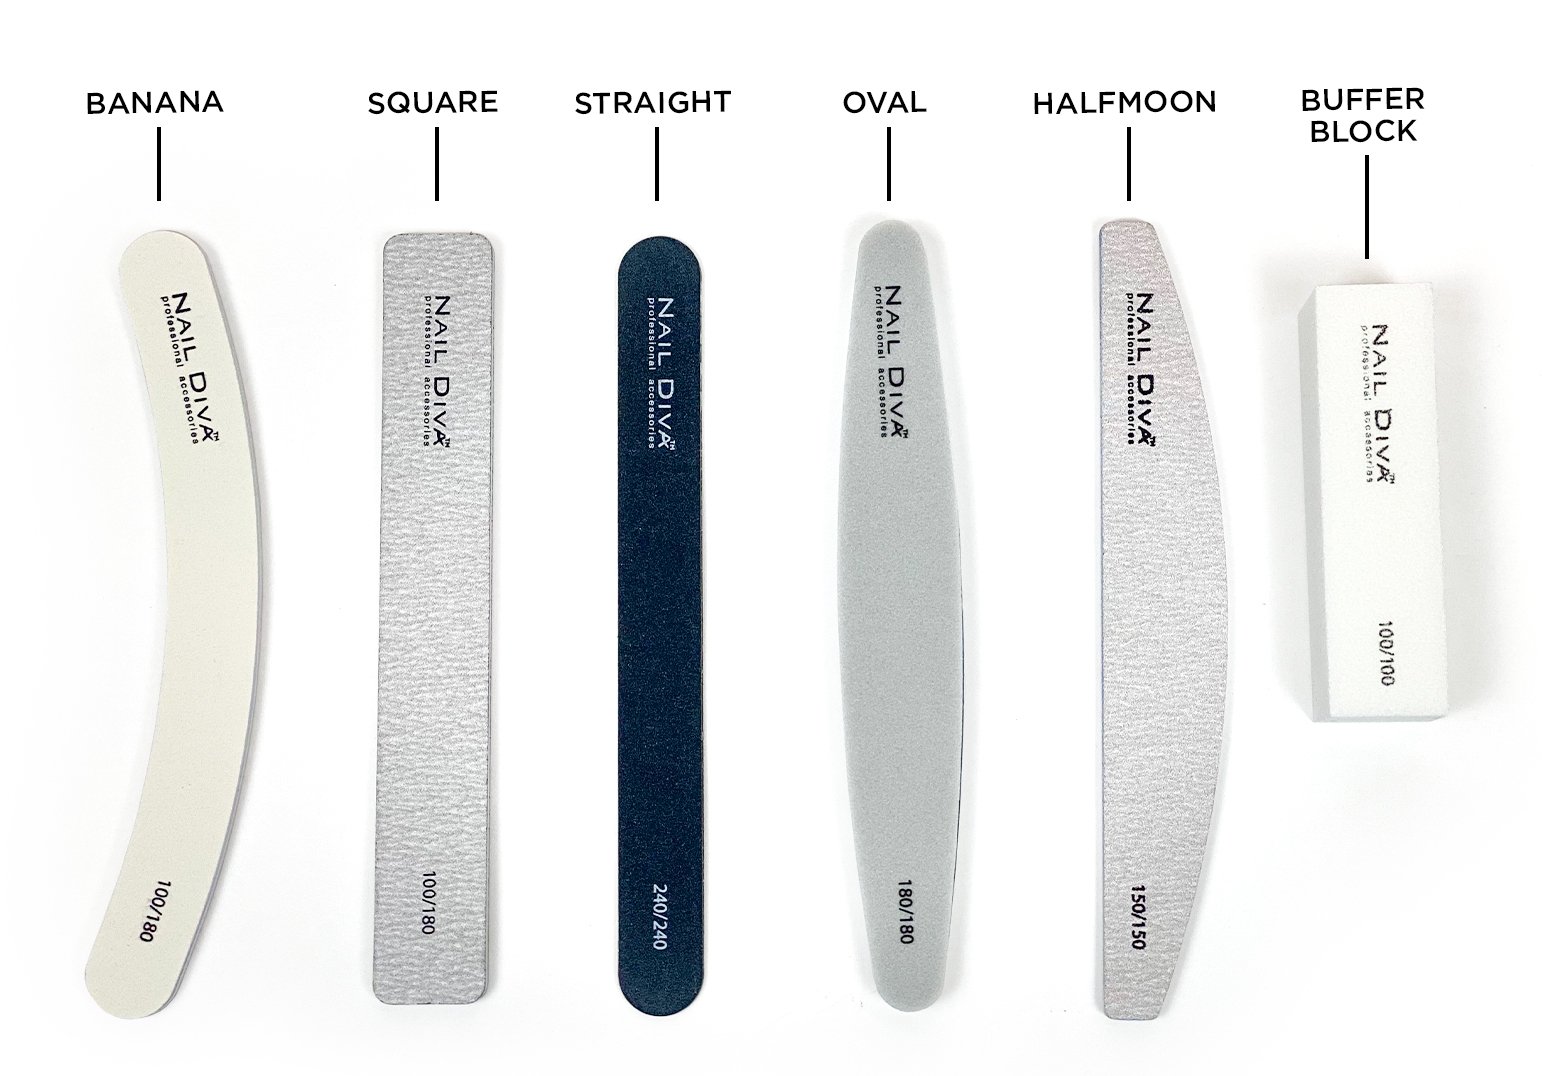
The shape of your nail file has different functions connected to what kind of filing you are doing.
Straight: A straight nail file is good to straighten the side walls and the tip of the nail, to achieve a slim looking nail extension.
Oval: The oval form has rounded sides on both sides and is ideal for the bottom area of the nail, around the cuticle. Furthermore, it is a broader nail file, so it files a larger area of the nail.
Banana: A banana file form is ideal to use in the cuticle area, as the form is rounded, to avoid harsh lines and overexertion of the wrist.
Halfmoon: Halfmoon shape is a combination of Straight and Banana, so you can file in both long strokes to straighten the side walls and the nail tip, while it has a curve that fits perfectly to the cuticle and results in soft and precise strokes along the cuticles.
Which type and grit to choose?
Files
Grit 100 file: Use grit 100 for old enhancement during the rebalancing and to shorten the enhancement. 100 grit may be used to remove any excess product if necessary, on a newly sculpted nail, but you should never use 100-grit on newly applied acrylic as the vibration can ruin the not fully cured molecule structure.
Grit 150 file: Grit 150 is good for rebalancing and shorten thicker enhancements. Just like grit 100, grit 150 may also be used to remove any excess product if necessary on a newly sculpted gel nail, but you should still be aware and never use grit 150 on newly applied acrylic as the vibration can ruin the not fully cured molecule structure.
Grit 180 file: Grit 180 is the best for fresh enhancements, which must be filed into shape. The reason here is that newly sculpted gel nails are more sensitive towards vibrations, and it is therefore best to use a softer file, to not break the molecule structure. But remember, it should be a goal itself to sculpt as precise as possible to minimize filing. Sculpt with the brush – not the file! You can also use grit 180 to blend tips to the natural nail and to remove any lifting prior to new product application.
Grit 240 file: Grit 240 is used to shorten the natural nail and file it into shape. This is the softer nail file and is therefore intended for natural nails. When you stick to grit 240, you are sure that you can file on the free edge of the nail (forward AND back) without destroying it. Filing with a coarse file on the free edge of the nail can destroy the bond between the keratin cells and make the nail porous, so that it separates in the layers. On top of the nail, it is recommended to carefully remove the shine with a grit 240 file (only in the direction of nail growth).
Buffers
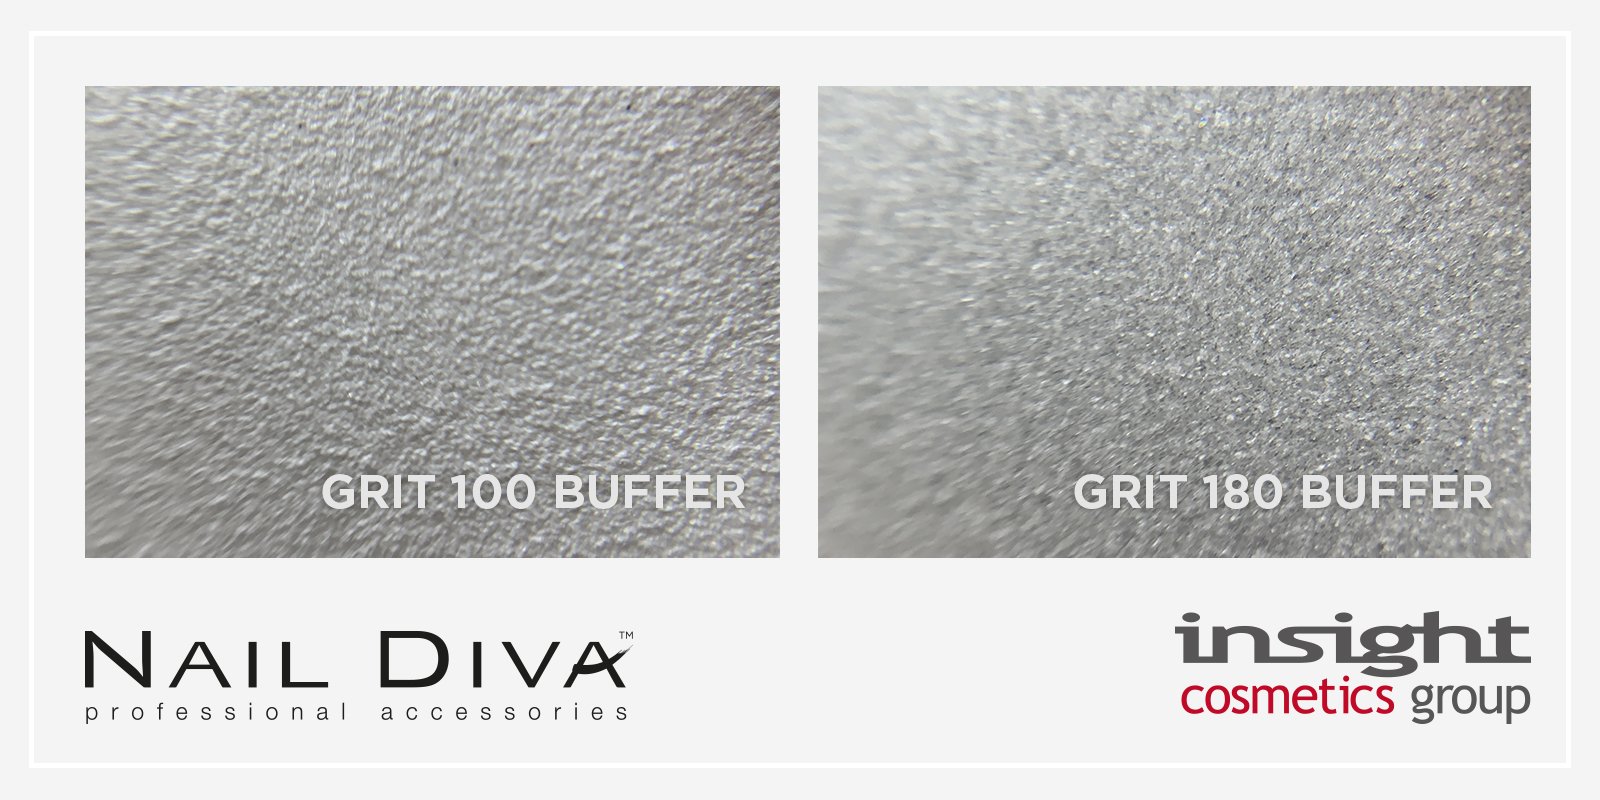
Grit 100 buffer: Grit 100 buffer is ideal to buff the surface of an enhancement, to buff harsh lines and deeper imperfections. It is not advised to use 100 grit on newly applied acrylic product.
Grit 180 buffer: Grit 180 buffer is softer than the 100 grit, and is ideal to buff the surface of a fresh gel enhancement, without too many harsh imperfections in. A surface that is buffed with 180 grit is also the surface that is recommended for the gel topcoat to adhere to.
Grit 240 buffer: Grit 240 buffer is used to remove shine from the natural nail and eliminate sharp edges. When using CND Shellac there is no need to file on the natural nail, but when applying gel, acrylic or some gel polish brands it is necessary to achieve the correct bond between the products and the natural nail. We recommend to only remove the shine from the natural nail with a grit 240 file and the grit 240 buffer is even more gentle. Even though grit 240 is a fine file you can still over file the natural nail, so it is all about paying attention to not file too many times over the surface with too much pressure. In order to get nail products to bind correctly on the natural nail, it is only necessary to carefully file the very top nail plate layers, where oil and non-living tissue can create a barrier between the natural nail and the product.
Grit 2.400-12.000 buffer: High gloss polishing buffer, which is for high shine buffing of both artificial and natural nails. Gives a shiny “wet-look”. Be aware, that nail polish does not stick to a surface that has been polished to high shine with a waxy file.
Tip: When you open a brand-new nail file, the edges are sharp, as they are fresh and untouched. You should therefore always file the sides of your new file with an old one, to avoid cutting into your customers skin, and to smooth the sharp edges.
Does the quality of the file matter?
Yes, the nail file can make or break the quality of your service, especially if you or your client care about details. The quality of a nail file is not only about how long time the file lasts, but especially also how much you can trust the grit and the quality outcome of your filing work.
When looking at file quality, it is typically divided into 3 types: Japanese, Korean or Chinese quality, with Japanese quality being the best, so let us talk about what Japanese premium quality actually is:Stone powder and grit size:
As mentioned earlier, the grit size is determined by the amount of grains, that can fit through a square inch filter. Not only the size of each grain, but also how much the grains can vary in size (the uniformity), should be controlled through an industry standard. One of the oldest, highest, and widely most respected standards, is the Japanese Industrial Standards (JIS), that defines not only the size of the grains, but also the uniformity. E.g. you can be sure, that the grit size of a 180 grit file manufactured according to the JIS standard (or Japanese quality standard) is exactly 70 micron (one micron is equivalent to one one-thousandth of a millimeter), whereas files not controlled might be 180 grit in average, but with grain sizes varying as much as 10 – 20% (140 – 220 grit), risking that the filed nail is left with an uneven surface, no matter how good you are at controlling the file.
Sanding paper quality:
The quality of the sandpaper, the paper that holds the grains, is important to the quality as well. The more uniform and smooth paper surface, the more evenly application of the adhesion layer, that forms the fundament for the stone powder. On the other hand, you also want a paper layer that is strong and tough, as it makes the file last longer. Manufacturing very thin paper that is strong and tough, but still with a very high surface smoothing, is not easy. This also requires a high level of knowledge and high standards, why high-quality file manufacturers source their paper with outmost care.
Adhesion:
The stone powder needs to be applied very evenly on the sanding paper not only to improve quality of the filing result, but also to improve the lasting of files for professional use, as an uneven stone powder layer increases the risk of tiny service break downs. This demands that the adhesion layer is applied very evenly and smooth. The adhesion layer on Japanese standard files is applied using a special machine, that secures an even, uniform and consistent appliance of the adhesion layer according to the JIS standard, whereas the adhesion layer of Korean and Chinese quality files most often is applied by hand, risking irregular grit and thereby reduced quality of filing and especially shorter lasting of the file.
How to clean and sanitize your nail files
Use of files in the salon
It is advised to only use a file for one customer in between disinfecting them, to avoid transferring any germs or virus between customers. Some salons even have personal files for their customers. When using your files in the salon it is therefore a good idea to have multiple set of files going. By doing that you can use a clean, disinfected file for each customer and then have a routine for cleaning them. Even though salons use personal files for each customer they should still be maintained by cleaning them to prevent them from getting weak too fast.
Maintenance of your files
All files (except for wooden files) should be cleaned and disinfected. Most often reason for the file to feel “used” is due to dust building up in between the grits and many nail professionals throws away their files before it is necessary as they don’t know any better. If you take good care of your files they will last much longer and be more efficient in use allowing you to work faster in the salon. It is therefore recommended to implement a weekly (or daily) sanitation routine for your files.
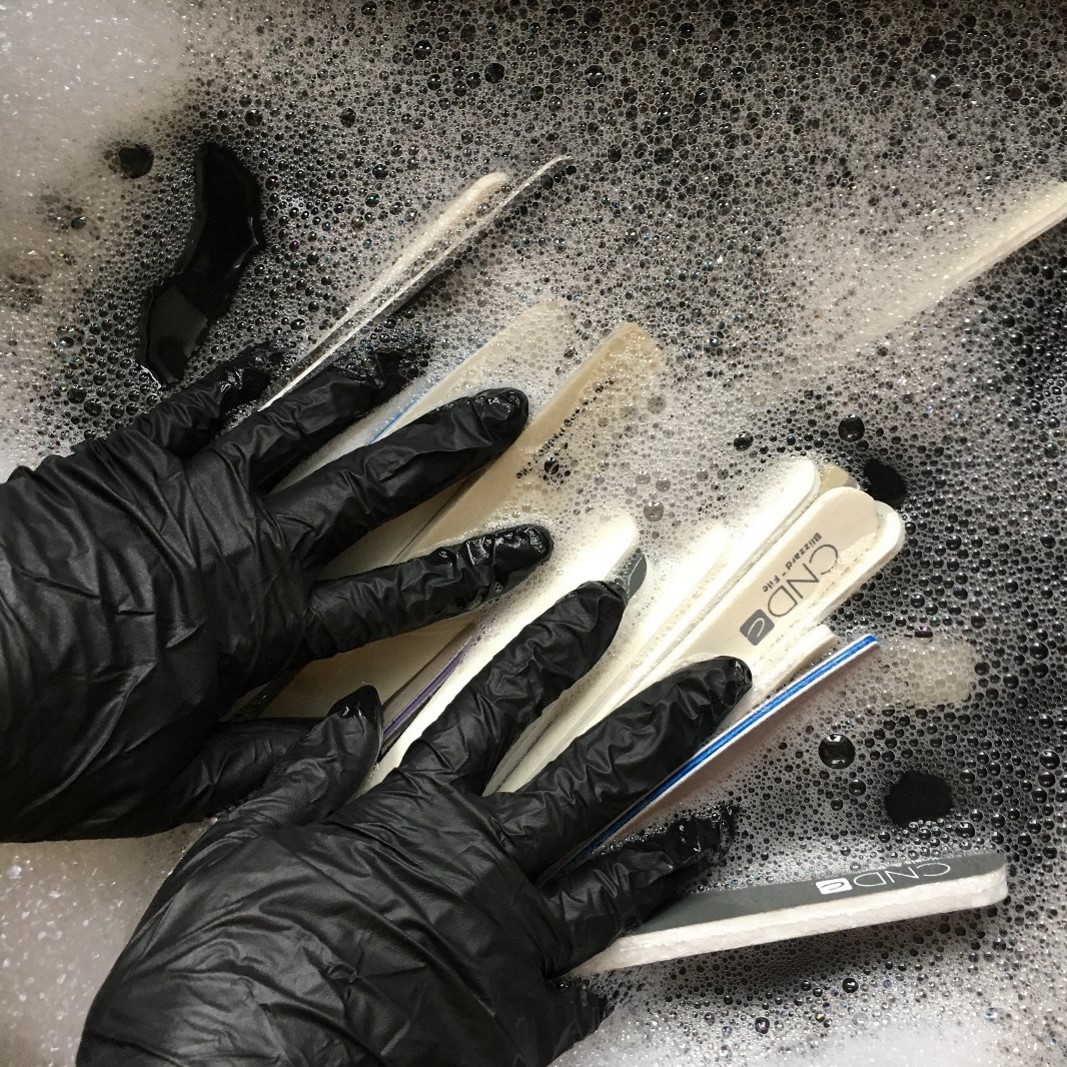
How to clean your files and Dust Brush properly:
- Remove dust on both sides of the files. This is done by dusting/brushing them off with a stiff nail brush.
- Rinse files and Dust Brush in warm soap and water, leave in for 2-3 minutes.
- Leave to dry, for example on a towel – or towel dry.
- Disinfect Dust Brush and each file on both sides with Chlori Spray™.
- Leave to dry.
- Voila – perfectly cleansed and disinfected files and Dust Brush ready for use.
- Store in closed bags or containers away from dust, so they won’t get contaminated before use.
Do nail files need replacing?
If you maintain a good routine with washing your nail files, their lifespan will of course be extended. But as with any other tool, they will eventually need replacement. Be aware, if a file is contaminated with blood (it happens) it cannot be sanitized but needs to be replaced immediately!
Do not try to get every cm of grit out of your file, because you are only making the job much harder, when you use a file with little to no grit left on it. To put it into perspective, it is as trying to file off material with a buffer. If you are working with a file with no – or very little – grit left, you will be forced to apply more pressure. This will cause three problems: Damage to the nail plate, additional time and additional stress on your hands and shoulders. In this industry, many of us suffer with back, neck, hand, and arm problems.
Remember – tools are there to make your life easier and work together with you, not against you. Your file should glide over the product easily. You want the file to do the work, not your arm. If you are having to put any force into the filing, then it is time to replace your file. Make sure you are regularly keeping on top of replacing your files to ensure you aren’t creating more work for yourself and risking damage to the client’s natural nail.
If you are a professional, quality matters
So now you learned about the difference between files and buffers, shapes, grit sizes, sanding paper, adhesion, quality standards and cleaning. The most important key learning hopefully is, that the quality of your professional files matter. Not only for the lasting of the file and how many times you can clean it, but also for the quality of your work, how difficult or easy it is to get the expected results out of your maybe perfect filing techniques, and especially for the protection of your clients nails and the protection of your hand, arm and shoulder. Buying low quality files can be one of your most expensive purchases long term, and quality doesn’t always cost a lot more.
Nail Diva™, the best combination of the highest quality levels in one file
Nail Diva™ files are produced according to the highest Japanese premium quality standards and using the best quality sanding papers from Europe (100 % recovered, high quality paper from Blue Paper™ in France) as well as the best possible adhesion methods in fully automated processes. Using Nail Diva™ files you are guaranteed the best possible quality, with uniform grit size and a core with appropriate thickness and elasticity for the best combination of efficiency, high precision results and protection of you and your clients.
There you have it – everything you need to know about nail files
Register here and receive an informative and clear overview about nail files and different nail shapes. Easily print it out and have it in your salon as an easy guide, and a helpful tool.